Gifting has never been easier
Perfect if you're short on time or are unable to deliver your gift yourself. Enter your message and select when to send it.
Here is your chance to get your question answered by AeroPress inventor Alan Adler! If your question is chosen, it will be shown right here with your first name plus initial along with Alan's answer.
Please understand we do not expect to be able to show all questions submitted and also that Alan will not disclose our product development plans or recommend products of other companies. If you are having a problem with your AeroPress coffee maker, please contact us.
I prefer medium roast. Light roasts tend towards sour. Dark roasts tend towards bitter.
Taste is personal. I recommend you try different origins and blends and also try different roasts. Light roasts tend towards sour. Dark roasts tend towards bitterness. Medium roasts are most popular. Medium roasted beans are about the color of milk chocolate.
So called "espresso" beans are often misnamed. In most of the world "espresso" has become a meaningless word for coffee. But in Italy espresso blends are mild because Italians drink espresso straight. The AeroPress is already mild. So brewing Italian espresso blends in the AeroPress might tend towards flat. But, of course, taste is personal. My current favorites are medium roasted Yirgacheffe beans and medium roasted Guatemala beans.
With AeroPress, all of the brewing process variables are under your control. The variables are water temperature, grind, amount of coffee and amount of water.
When you follow our printed instructions you make espresso-strength brew, which is 4 times more concentrated than American coffee. Our instructions are to dilute this concentrate with water to make American coffee or with milk to make a latte.
Some people are surprised that we press espresso-strength, then dilute. But that makes the smoothest brew. Pressing all of your water through the grounds will taste more bitter.
If you would like to experiment, here are some ideas:
For richer strength, use more coffee and/or finer grind.
For more "bite", use hotter water. But keep in mind that in our blind-tasting tests, coffee professionals and every-day coffee lovers preferred AeroPress brew made with 175F (80C) water. So try that first.
It takes 17 minutes for a small kettle to cool down from boiling to the optimum 175F. The easiest way to get the right temperature is with an adjustable-temperature electric kettle which stops heating at your set temperature. It's fast and consumes less energy than bringing the water to a boil.
If you had asked how to make a richer cup, I would have recommended you use a finer grind. If you really do want a more acidic coffee (an unusual request), increase your steep time and/or your water temperature. Also, simply try more grind. You might like the resulting richer flavor.
Users invented the inverted method. I think it began with Scott Marquardt in Chicago. I resort to that rarely when I have some coffee that was ground too coarse. But I don't steep because that increases bitterness. I just stir and immediately twist on the cap and filter, revert and press.
If your grind is between espresso and drip, the normal method works great. The tiny amount of brew that drips before you press has no perceivable effect on flavor or richness. I use the normal method every day.
The brewing process is the same in the AeroPress and the AeroPress Go so the quality of coffee brewed is the same. The AeroPress is larger so it brews more coffee and the AeroPress Go is smaller but it includes a mug with lid that also serves as a carrying case.
Coffee beans naturally contains oils which float on water. You can see oil on the surface of dark roasted beans. Even light roasted beans contain the same amount of oils, but they haven't been forced to the surface by extended roasting. Paper filters, bleached or not, remove some of the oils and re-filtering removes more oils. The effect on flavor is subtle.
We don't currently offer a larger model. But you can prepare concentrate in a few minutes before the arrival of guests. Just press a couple of triples (3 scoops each) and put it aside. Then, after dinner you can dilute the concentrate for American coffee, add milk for lattes, or offer straight concentrate as a very smooth espresso.
You can also press some concentrate and take it to work in a small container. Then dilute and drink it at work.
Thank you for contacting us. Yes, we are considering a larger AeroPress, but you can make large quantities with your existing AeroPress by brewing 3-scoop espresso-strength concentrates according to the instructions which came with your AeroPress and are repeated here
It only takes a few minutes to do each 3-scoop pressing. Each makes 3 servings of American coffee or latte. I store the concentrate in my fridge, then add water for American coffee or milk for a latte when I want to drink or serve it.
Thank you Kent. Are you pressing concentrate, then diluting as we recommend? Press 3 scoops, then dilute for 3 servings. Coffee brewed this way is sweeter than when you press all the water through the puck.
The AeroPress is designed to make 3 shots of espresso style coffee with one pressing and those shots can be made into 3 cups of American coffee. If you prefer to press all the water through the grounds, then it just makes one cup of American coffee with each pressing. As of now, we do not offer a larger model.
It depends on where you are. Orders processed here will take 3-5 business days for US domestic to arrive. Overseas deliveries can take anywhere from 7-16 days. Delivery details will be provided in your confirmation email.
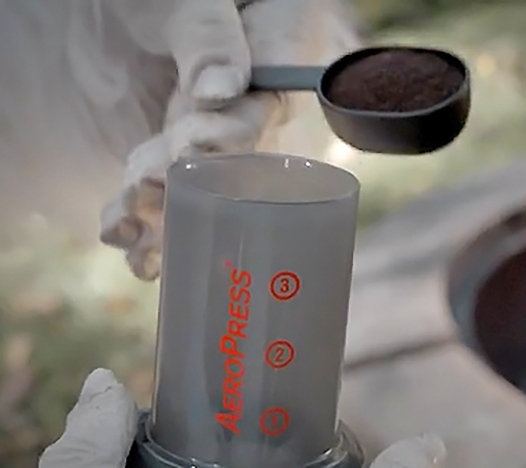
The capacity of the AeroPress scoop is between 12 and 14 grams of ground coffee depending on how rounded you fill the scoop. If you use one rounded scoop and fill the AeroPress with water to the top, you will brew about 8 oz. of American style coffee. If you use 3 rounded scoops and fill the AeroPress to the “3”, you will make enough espresso style concentrate to make 15 oz. of American style coffee by adding hot water.
I am glad to hear you are enjoying your AeroPress. And thanks for your enthusiasm for a giant AeroPress. We shall see.
Follow our instructions to brew some 3-scoop pressings of espresso style coffee prior to the guest's arrival. Then add hot water to serve American style coffee or add milk for lattes. This enables serving multiple guests rapidly.
The AeroPress and the AeroPress Go will both press into a mug with a minimum opening diameter of 2.75”. Yes you can certainly brew a cold brew concentrate and then add boiling water to make it hot. You will need to experiment with ratios to reach your desired drinking temperature. Yes, one scoop of beans equals about one scoop of the beans ground.
You can brew two 8oz cups of coffee with one pressing of the AeroPress. Just brew two shots of espresso style coffee (use two rounded scoops of "fine drip" ground coffee) and then add hot water after the pressing to create two 8oz cups of American style coffee.
Thank you for your question. I brew three cups often. The instructions are: 3 scoops of grind (use ordinary drip grind), then fill water to [3] on the chamber, stir and press. Dilute the pressing, which is espresso strength with water to make 3 cups of American coffee, or with milk to make 3 lattes.
You can clean off the sticky material by removing the seal from the end of the plunger and then aggressively washing your seal with very hot, soapy water and a paper towel multiple times if needed. The stickiness tends to occur when an AeroPress has been sitting idle so a way to avoid stickiness in the future is to use your AeroPress regularly. Alternatively, you can buy an inexpensive replacement seal from our website, aeropress.com. We now make the seal of silicone, a material that will not develop stickiness.
Sticky coffee oils can build up in the chamber. If the inside of the chamber feels sticky when you drag you finger on it, then clean it and the rubber seal with vinegar. After that wipe a bit of vegetable oil on the edge of the seal that contacts the chamber. If the problem persists, then it probably is the grinder. Remember too, that it's easiest to press gently.
Sticky coffee oils can build up in the chamber. If the inside of the chamber feels sticky when you drag you finger on it, then clean it and the rubber seal with vinegar. After that wipe a bit of vegetable oil on the edge of the seal that contacts the chamber.
I am very glad to hear that you enjoy your AeroPress. I have three suggestions that I think will help with your problem. First, soak your chamber in vinegar for ten minutes or so and then wash it thoroughly with soap and warm water. Second, remove the seal from the end of your plunger and thoroughly wash the seal in soap and warm water. Then put the seal back on the plunger and try your AeroPress. If it is still difficult to eject the puck, put a little vegetable oil on the edge of the seal to provide a lubricant.
Thank you for your comments. We too have used that method too. I first read about it in a 2005 AeroPress review by Mark Prince, the owner and founder of the coffeegeek forum.
Use a finer grind and the early drip through will be minimized and you will brew rich coffee. You can also stir the coffee and water in a separate cup for a minute or two, then pour the slurry into the AeroPress and press.
For a single scoop, any stirrer is fine. But a wide paddle is better for double and triple scoop pressings to insure that clumps of dry coffee are fully mixed.
Measuring the weight of coffee is more precise than using scoops but I think the precision of scoops is good enough for most people. A rounded AeroPress scoop, which is our recommendation, holds about 14 grams of ground coffee.
It's an illusion. Both scoops have the same volume.
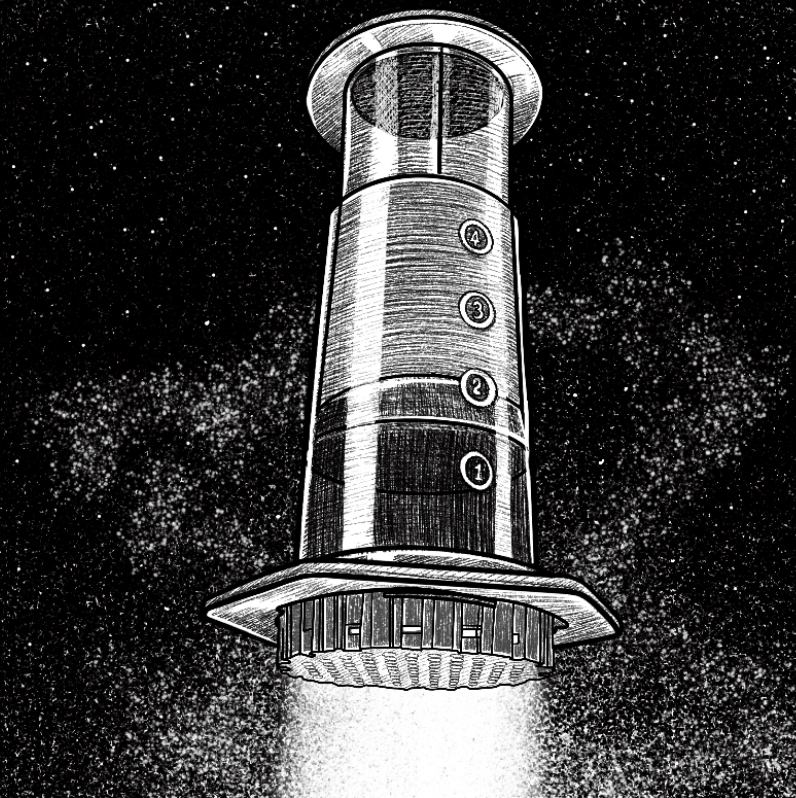
We originally stated that you could make 4 servings per pressing but some people reported that four scoops of freshly roasted coffee together with hot water filled to the 4 would spill over the top so we now recommend 3 servings max. We left the numbers as they were on the chamber.
After a few years we learned that the ridges on the plunger were causing scratches on the inside of the AeroPress chamber. The scratches were not deep enough to affect performance but they were unsightly and the ridges provided no benefit so we eliminated them.
No special reason. Both patterns function equally well.
The AeroPress brews faster than gravity drip methods, because of air pressure. The short time extracts rich flavor and leaves the bitterness in the grounds. And, of course, the AeroPress allows you to use any temperature water. 175F (80C) water is the overwhelming favorite of many tasters. If you haven't tried that you owe it to yourself to give it a try. Now we've discovered that AeroPress can brew in two minutes with room-temperature water. That brews the smoothest cup of all.
The AeroPress Go stirrer needed to fit inside the packed up AeroPress Go, so we had to forego that feature. But we rounded the tip so that contact would be unlikely to tear the filter.
Initially the AeroPress had exactly the ribs that you describe but we found that the ribs caused minor scratching on the inside of the chamber which affected appearance and they really were not needed. If your seal becomes loose in the chamber, order a replacement seal from this website.
There are no markings on the current AeroPress plunger. However many years ago, the plunger was marked. Now the number markings referred to in the instructions are on the chamber.
Thanks for being such a fan of the AeroPress. Rather than trying to use words, I think the best description of how to repack the AeroPress Go in its mug is the video found on our website here
The flat black folding component is a stirrer that unfolds to stir the brewing coffee and folds back up to fit in the AeroPress Go when packed in the mug for travel. There is also a folding filter holder, capable of holding a week's supply of filters.
It is normal for a small amount of coffee to drip through prior to pressing. If you are experiencing an excessive amount of early drip through, you need to use a finer grind of coffee and to give the chamber a shake to level the bed of coffee. One way to confirm that the grind is the problem would be to brew using your friend’s ground coffee in your AeroPress.
Try using a finer grind of coffee. It will slow the water going through the filter and result in a richer extraction.
Use a finer grind of coffee.
Please use a finer grind of coffee. Also, remember to give the AeroPress a shake to level the bed of coffee before adding water.
AeroPress paper filters are both reusable and compostable.
Filter paper manufacturers stopped using the gaseous chlorine bleaching process decades ago so dioxin is no longer an issue with paper coffee filters. They also thoroughly wash the filter paper they produce so pre-washing AeroPress filters is unnecessary. Taste tests have confirmed that nobody can taste the effect of pre-washing or pre-wetting AeroPress filters.
Our AeroPress paper filters feel sturdy because they are small. They do not contain any other material. They are made of the exact same filter paper that is used to make the cone filters you can buy in your local grocery store.
I designed the funnel to facilitate the pouring coffee grounds from a grinder bin directly into the AeroPress chamber.
I designed the funnel to help pouring of ground coffee from a grinder bin into the AeroPress chamber. It was a coincidence that the AeroPress fits into the funnel. Some people have used it to press into a small cup. That's dangerous. Always press into a sturdy mug.
The use of the funnel that you described was just coincidence. I designed the funnel to facilitate pouring ground coffee directly from the bin of a grinder into an AeroPress chamber.
Many people measure the amount of coffee they wish to use at the beans stage and then put the beans into their grinder. The funnel is designed to facilitate pouring from a grinder bin directly into the AeroPress chamber. Some people have tried using the funnel to facilitate pressing into smaller mugs. We did not design the funnel for this use and strongly advise only pressing into a large, sturdy mug.
We do not recommend on our website products of other companies so I cannot recommend a particular burr grinder. My advice on coarseness is to use finely ground coffee. You will get a rich extraction. If pressing is too difficult with the amount of coffee you use, back off a little in the fineness until your gentle pressing takes about 30 to 60 seconds.
The right grinder setting depends on your grinder and also on the number of scoops of coffee you are brewing per pressing. Experiment. When pressing gently, aim for a press time of from 40 to 60 seconds.
The various cups on the market contain ground coffee so yes you can use their coffee in your AeroPress. The coffee may be a bit stale and also not finely ground enough so you will need to experiment with the amount of coffee and the steep time to make a cup you enjoy.
1. You can buy any AeroPress replacement part on our website, www.aeropress.com. 2. Your difficulty pressing is probably due to too fine a grind. Experiment with a coarser grind until your gentle pressing takes 30 to 40 seconds. 3. These experiments will probably lead to a grinder setting between espresso and drip. Also, consider the number of scoops you press and use a coarser grind when pressing more scoops.
Hi Ray, Thanks for your message. If you grind at home, set the grinder coarser for 3 scoops. Alan
Try one half scoop and water to #1. Stir and press verrrry gently. If that works, you might try a full scoop. But you must press very gently.
Grinders influence the flavor of the brew from espresso machines, but not from the AeroPress. With the AeroPress, the effect of grind is only that finer grinds will deliver a stronger brew for your money. But you can also get that by using more coffee. When using fine grinds, you must press gently and allow more time. If you press hard, the bed of coffee will be compressed and block the flow. I like to press into a clear glass mug and press barely hard enough to make a slow trickle of coffee into the mug. Pressing takes about a minute.
Most burr grinders above $100 are quite satisfactory. But avoid the cheapies.
In the coffee world "acidity" is a desirable flavor parameter. I'll assume that you are referring to acid level. AeroPress brew has lower acid level because of the short wet time and the lower brewing temperature. We discovered that when we measured the brew with a pH meter.
I did compare against Chemex and cone filter pourover. They required 4 to 5 minutes drip time which resulted in more bitterness than AeroPress. The Clover was developed after the AeroPress but we had a "tasteoff" with judges against it at the Intelligentsia booth at the SCAA convention in Charlotte. The result was nearly a tie.
The inspiration was really more like frustration. I could not make a good single serving of coffee using the various coffee makers I owned, so I decided to study the fundamentals of coffee brewing. I discovered that lower temperatures tasted much better. I also wanted to try shorter wet time, but pressing on the slurry in a pour-over didn't shorten the filtering time. So I made an air-tight brew chamber which I could press to shorten the filtering time. That was really the first AeroPress. I was amazed at how smooth and rich the brew tasted. Next, I made over 30 prototypes to experiment with variations in the basic configuration. I then made five duplicates of the best version and loaned them to five high school teachers to use at home for two weeks. They loved them, so we went forward to production.
The wife of our General Manager worked at a local high school and lined up the testers.
Yes, many people report that they use their AeroPress to separate tea from tea leaves which means you can certainly press tea over ice and make iced tea. I steep the tea leaves in a measuring cup for a few minutes. Then pour the slurry into the AeroPress to filter out the leaves.
My recommendation for brewing an espresso style shot for use in making a latte or a cappuccino is explained in my instructions. They can be found here. If you are following the instructions and your brew is still watery, you can make your brew stronger by adjusting the brewing variables; use a finer grind, use more coffee, use less water, increase the steep time. I encourage experimentation to find the brew you like.
The instructions that come with the AeroPress and that are always available on our website here. were written by me and include how to make an espresso style cup. I follow the instructions every morning to make a latte for my wife and myself.
Yes, the AeroPress Go mug is microwave safe.
As you already know, you can see the various materials and printing used in the manufacture of the AeroPress over the years by visiting this page. You can see that we never made a polycarbonate AeroPress with gold lettering so your AeroPress cannot be made of polycarbonate.
We liked the appearance of the red print so we switched.
We changed from making the seal out of thermoplastic rubber to making it out of silicone because silicone is more durable. We did not detect any flavor difference.
Thank you for your question and yes this is me (Alan). I enjoy answering people’s questions about the AeroPress. Your suggestion to improve the look of the AeroPress is one we often hear. We just as often hear from fans on the other side who like the techy purely functional look. We consider changes like offering different colors from time to time but you need to be aware that when this is done, it adds great complexity to distribution. However, I sincerely appreciate your kind words. Feedback like yours is an aging inventor's reward.
Yes, football used to be the only sport I watched. I followed the 49ers and Stanford, where I taught part-time. But I (and my friends) began to feel guilty about players sacrificing their health for our entertainment. So I backed away somewhat. But I confess following the 49ers last year.
Favorite players (current): Jimmy Garoppolo, George Kittle, Arik Armstead, Nick Bosa, and Christian McCaffrey (who went from Stanford to the Panthers).
Favorites (retired) Jerry Rice, Joe Montana, Steve Young. I could name many more greats, but these are the players that I often watched. I've briefly met Montana and also Y.A. Tittle.
Dear Grant,
My 37 minute aerodynamics lesson is the only aerodynamics video available. But here are some other videos that might interest you.
Thank you,
Alan
https://www.youtube.com/watch?v=kK91CEc5TMc
https://www.youtube.com/watch?v=c0YCY2Fd448
https://www.cbsnews.com/video/aeropress-coffee-maker-wins-fans-worldwide/
Hi Nick,
I recommend books which teach the science affecting the invention. For example, if it flies, books on aerodynamics. When I teach inventing, I say, "Learn all you can about the science related to your invention". Studying patents related to your ideas is easy now that we have google patents. It's helpful to see what others have invented. Most inventions fail to reach production, so you'll see things that are not for sale.
Regarding making prototypes, 3D printing is used most often. But the process might not work for your invention. It's not watertight. I have a lathe and a milling machine in my garage. Neither is computer controlled. I enjoy making things on my machines.
Alan
Thank you for your comments. I get great satisfaction from hearing about people enjoying my inventions.
Here's a description of the event. http://coffeegeek.com/forums/coffee/machines/226736#226736. The biggest difference is the price. At that time the Clover sold for $8,000. Later the price went higher.
AeroPress coffee makers are made in the USA.
Your procedure of separate and air dry is excellent. To make storage more compact you can leave the plunger pushed all the way through the chamber so the rubber seal protrudes and is not compressed inside the chamber. Let me add a suggestion. Remove the rubber seal from the end of the plunger every couple of months and clean the seal inside and out and the tip of the plunger.
Those are not model numbers; they are stock numbers that vary by how the product is packed. All stock numbers that begin with “8” denote cases of our original AeroPress coffee and espresso maker so all of the stock numbers in your question denote cases of our original AeroPress.
An AeroPress is going to get scratches. Ground coffee contains some hard bits. I recommend continuing to use your AeroPress until it stops working properly. The rubber seal is the component that gets the most wear but when it gets loose you should just visit our website, www.aeropress.com, and buy a new rubber seal. It is easy to replace on the end of the plunger.
Thank you for your good suggestion. Made in the USA is on our packages. We will find a place on our website.
I've never seen any shape other than a cylinder. We call it a "puck". It's flat on the top and the bottom.
I strongly recommend against shortening the chamber. Towards the end of a pressing, the plunger is pushing air through the grounds and extracting flavorful brew. If you shorten the chamber, there will be less air pushed through the grounds and they will be soggy, leaving a lot of tasty brew in the soggy grounds. Incidentally, the amount of brew left is the AeroPress "puck" is about equal to the weight of the dry grounds. The amount of brew left in used pour-over grounds is about twice the weight of the dry grounds. So the AeroPress delivers more good brew to the cup.
The original AeroPress and the Go have the same cylinder and cap diameter but the flange that supports the AeroPress on your cup is smaller on the Go. The Go can sit on a cup with a maximum inside diameter of about 3.25” whereas the original AeroPress can sit on a cup with a maximum inside diameter up to about 3.75”.
Thanks for your question. We know that the AeroPress will not properly sit on some extra large mugs. We sized the AeroPress to properly work on 95% of mugs and apologize that some large mug owners will need to press into one and then pour into their preferred drinking mug.
Yes, we definitely are working on new coffee products but (like most companies) new product plans are confidential.
I don’t comment on our product development plans but I can say that I find the small battery powered hand held frothers work very well.
Pressing gently is fastest. And fastest gives the smoothest brew. If you press too hard it compacts the bed of coffee and blocks the flow. I like to press into a clear mug and see individual drops fall. That's about 12 pounds of force
It takes 30 to 60 seconds, depending on the amount of coffee and the fineness of grind.
The more coffee and/or the finer the grind, the more important it is that you press gently. Because pressing hard (even briefly) will compact the coffee and block the flow. So always press gently and be patient. It might take 60 seconds or longer.
I sometimes use some olive or other cooking oils to lubricate a new AeroPress seal but once an AeroPress gets into regular use, I find coffee oils provide enough lubrication.
We recommend pressing gently and having patience when brewing with an AeroPress. Try it. You will be surprised. That's because pressing hard compacts the bed of coffee and blocks the flow.
We recommend pressing gently (about 12 pounds). That gives the shortest time and the smoothest flavor.
I encourage pressing gently when brewing with an AeroPress and gentle pressure in an AeroPress equals about 1/4 of a bar. If you press hard, the pressure will be about ½ of a bar. We conducted extensive taste tests and the amount of pressure applied did not affect the taste of the coffee brewed.
Our instructions say to press until the plunger reaches the puck. There are a zillion AeroPress tips in the coffee world and one says to stop pressing when the flow of liquid has turned to hissing air. I have a sensitive palate but could not detect any difference when I tried that.
Hi David, I love physics. There are dynamic effects. The drag on each particle of grind is proportional to the flow velocity squared. So the dynamic drag on particles pushes them downward, compressing grind below. Then phenomenon below begin. I think that we can visualize any strata of grind as being sufficiently dense to behave approximately like a porous semi-solid. Pressing hard causes that strata become more densely packed and to also compress the grind below it. As we press, the more we compress the slurry, the greater this effect. There is no doubt that the pressing hard blocks flow and pressing gently gets the job done.
I recommend brewing a concentrate and diluting after the pressing. This tastes sweeter and smoother than pushing all of the water through the bed of coffee.
I make myself a "double-latte" every morning. I press two heaping scoops of coffee with water to between numbers 2 and 3. Then I top off the mug with about 6 oz of whole milk. Sometimes I drink it cool, other times I heat it for 45 seconds in our microwave. But really there's no "best" way. Whatever you like is best for you.
Every morning I press two scoops with water to level 2. That produces espresso-strength. Then I add some milk and nuke it for 45 seconds in our microwave.
Yes, we now recommend that people try brewing with room temp water. The brew is delicious and very smooth. Increase your stirring time to one or two minutes when using room temperature water to get full flavor. This may defeat your objective of saving time.
AeroPressers are inventors. I've tried that method but the result tasted similar to the simpler method of our instructions. Try it yourself and see what you think.
Hello Alanna, I tested your suggested method in my lab today. There were substantial variations in strength for each cup and even greater variations in the amount of brew in each cup. It's hard to equally divide at this stage.
The way I've always done it is to press it all into one cup. Then add some water so the cup is about 2/3 full, stir, and dispense equal amounts into the three serving cups. The added water makes it easier to share 3 equal servings. NASA scientist Craig McReight taught me that trick. Finally, top off all three cups with more water to achieve American coffee strength.
If you wish to halt the trickle for awhile, just insert the rubber seal a half-inch into the top of the chamber and the trickle will stop. This is similar to what we do when we clamp our thumb on the top of a straw to stop dripping out the bottom of the straw. Extending the brew time will result in more bite in your brew.
The strength of coffee you enjoy most is personal so you should conduct some trials to determine your favorite way to brew using your AeroPress. The instructions that we provide with the AeroPress suggest using one rounded scoop (about 14 grams) of coffee for each shot of espresso style coffee desired and for each 8 oz serving of Americano style coffee. Try three rounded scoops and fill your 24 oz mug with Americano style coffee. That is a lot of coffee so you may need to use a slightly coarser grind and a little longer steep time. Experiment.
I recommend stirring for about 10 seconds and then pressing without delay. The short wet time helps to make AeroPress coffee less bitter than other brewing methods.
First let me say that if you ever want to read or download the instructions for an AeroPress coffee maker you can do so on our website, aeropress.com. Your boyfriend is using his AeroPress as a pour over brewer, depending on gravity to push the hot water through the coffee grounds. A pour over brewer makes good coffee but an AeroPress makes even better coffee because the pressure accelerates the brewing process shortens the wet time, yielding a smoother brew. It was my desire to try shorter wet time that led me to try air pressure. When I first tasted the result I was amazed and delighted by how smooth it tasted. It was the smoothest brew I had ever tried.
I don’t think wetting the grounds prior to wetting them when you add hot water will make a difference but we have not blind taste tested that additional step in the brewing process.
One scoop of grind and fill hot water to the [1] on the chamber produces a single espresso-strength shot. A double shot is made with two scoops of grind and fill hot water to [2] on the chamber. If you want it more concentrated, try two scoops of grind and water filled to between [1] and [2] on the chamber. Alan
A level scoop holds about 12 grams of beans or grind. Every morning I used 2 and a half scoops which is about 30 grams.
When used as directed, all but the rubber seal should last for decades. But the rubber seal might need replacing after a few years. You can order replacements for any lost or worn parts at aeropress.com.
Certainly the AeroPress Go will work fine in your home. The AeroPress Go is a somewhat smaller AeroPress that includes a cup and lid for use for pressing and drinking and also as a carrying case when on he go.
I am sorry the numbers on your chamber are not as visible anymore. You can mark the outside of your chamber with a Sharpie pen.
Your seal leaking is an indication that your seal is worn. You don’t need to buy a new AeroPress. Just buy an inexpensive replacement seal on our website, aeropress.com. Thank you for being such a fan of the AeroPress.
The silicone rubber seal just fits on the end of the plunger. You can remove it by prying it up on one side or grabbing it hard with a towel.
Kenny, thank you for your kind words. I truly enjoy hearing about your enjoyment of our product. We don’t have an increased life expectancy number for our change to a silicone seal but we are quite confident it is substantial.
I remove the rubber seal every several months and brush it off under warm water. Originally we made the AeroPress rubber seals out of thermoplastic elastomer which lasted about five years if properly cared for. For two years now we have been making the rubber seals out of silicone. We expect our silicone seals to last longer than the old ones made of TPE but we really don’t know how long they will last. I have never personally had a seal wear out.
Your coffee is leaking around the rubber seal. With use the seal eventually will become loose and let some coffee leak around it. You wrote that you store the plunger inside the main part. The AeroPress instructions advise against storing the seal inside the chamber because holding the seal compressed inside the chamber eventually will reduce the size of the seal, enabling coffee to leak around it. When your seal becomes loose, you can buy a new seal on this website. The seal can easily be replaced on the end of the plunger.
It is normal for the plunger to feel a little "springy". The compressed air in the chamber is an "air spring". But remember too, that if you press hard it compresses the puck of coffee and blocks the flow. So press gently and wait 30 to 60 seconds for the liquid to flow through. Also, you may want to try a coarser grind.
Your AeroPress has probably not changed. More than likely your grind has changed even if you (or the store) are using the same grinder. Try setting your grinder on a finer setting or, if that does not help, have your grinder serviced. Grinders get dull with use.
More than a dozen subjects, ranging from coffee professionals to every day coffee drinkers chose 175F (80C) as the water temperature which yielded the best flavor. The short steep time resulting from ten seconds' stirring also contributed to the best flavor. Since the original testing, we've found that a stirring time of a minute when brewing with room temperature tap water yields excellent flavor.
Have you tried room temperature water? It makes a delicious brew.
My favorite way to heat water if you have a microwave oven is to heat a certain amount of water in the microwave oven for the number of seconds it takes to reach the desired temperature. All you need to do to learn the desired number of seconds is to borrow a cooking thermometer one time and experiment to learn the number of seconds you need in the microwave oven to get to the desired temperature. After that all you need to do is remember the number of seconds needed in the microwave oven. If you don’t have a microwave oven or if you don’t have a friend with a cooking thermometer, heat water in your steel vessel on your gas stove until the water starts forming air bubbles on the side of the vessel. The water will be about 175°F. If you think the water was not hot enough, heat the water until you get to a set amount of time such as 20 seconds past the air bubbles forming. Adjust the number of seconds until you reach the brewing temperature that brews coffee you really like.
Put a dial thermometer shaft in your kettle. Either through the spout, or through a small hole that you drill in the top. When the kettle starts "ticking" watch the thermometer and stop heating when it nears 80C.
Cart (0)
Explore our best sellers to find the right AeroPress for you!
Free Shipping On Orders $55+